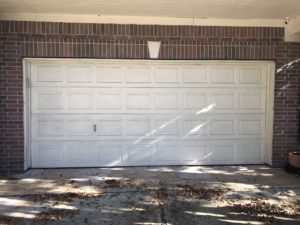
Since posting a video of these DIY Faux Wood Garage Door to our YouTube account last November, we’ve gotten a multitude of questions and great feedback about it, so I decided to make a quick “How to” post about it.
I have always loved the look of Wooden Garage Doors, however real ones can set you back a few thousand dollars and not everyone is willing to spend that kind of money. A little while back, while browsing through Facebook I came across the video “Fake A Wood Garage Door” at the DIY with Hometalk channel that I thought would be great to follow. While we followed a similar procedure, we did use a bit of a different technique and went darker on our colors to achieve a richer “wooden” look. The final look is one that I absolutely love. While the technique itself is not hard, you do have to be a bit patient with this project since it’s not something you can do in a couple of hours, however it is very rewarding.
Pretty soon you will want to paint all kinds of things to look like this.
Let’s get started, time to gather your materials.
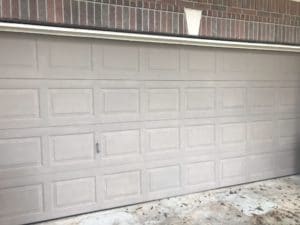
Note: We didn’t use any primer on this project since we used the Chalk Paint® as base, however if you are not using Chalk Paint® as the base, I recommend starting with two coats of an oil based primer of your choice. Follow this with a light brown standard paint, to make your “base color”.
TIP: You can paint over an oil based primer with water based paints and glazes, but not the other way around.
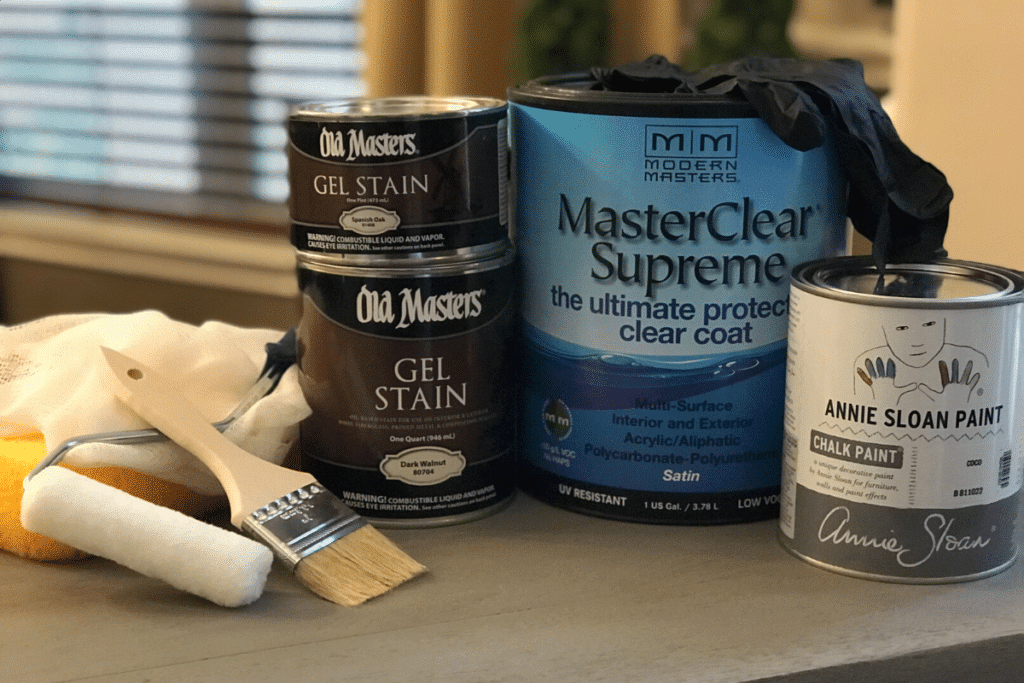
- Annie Sloan Chalk Paint® in Cocoa – (Check your closest stockist)
- Modern Masters MasterClear Supreme in Satin Finish – Amazon link here
- Old Masters Gel Stains in Spanish Oak (here) and Dark Walnut (here)
- A couple of Chip Brushes here
- Cheesecloth and Sponge (We ended up not using these since we achieved the desired look without them)
- Latex or Nitrile Gloves
- 4″ Roller
Once you’ve gathered all of the materials you’re ready to start your project.
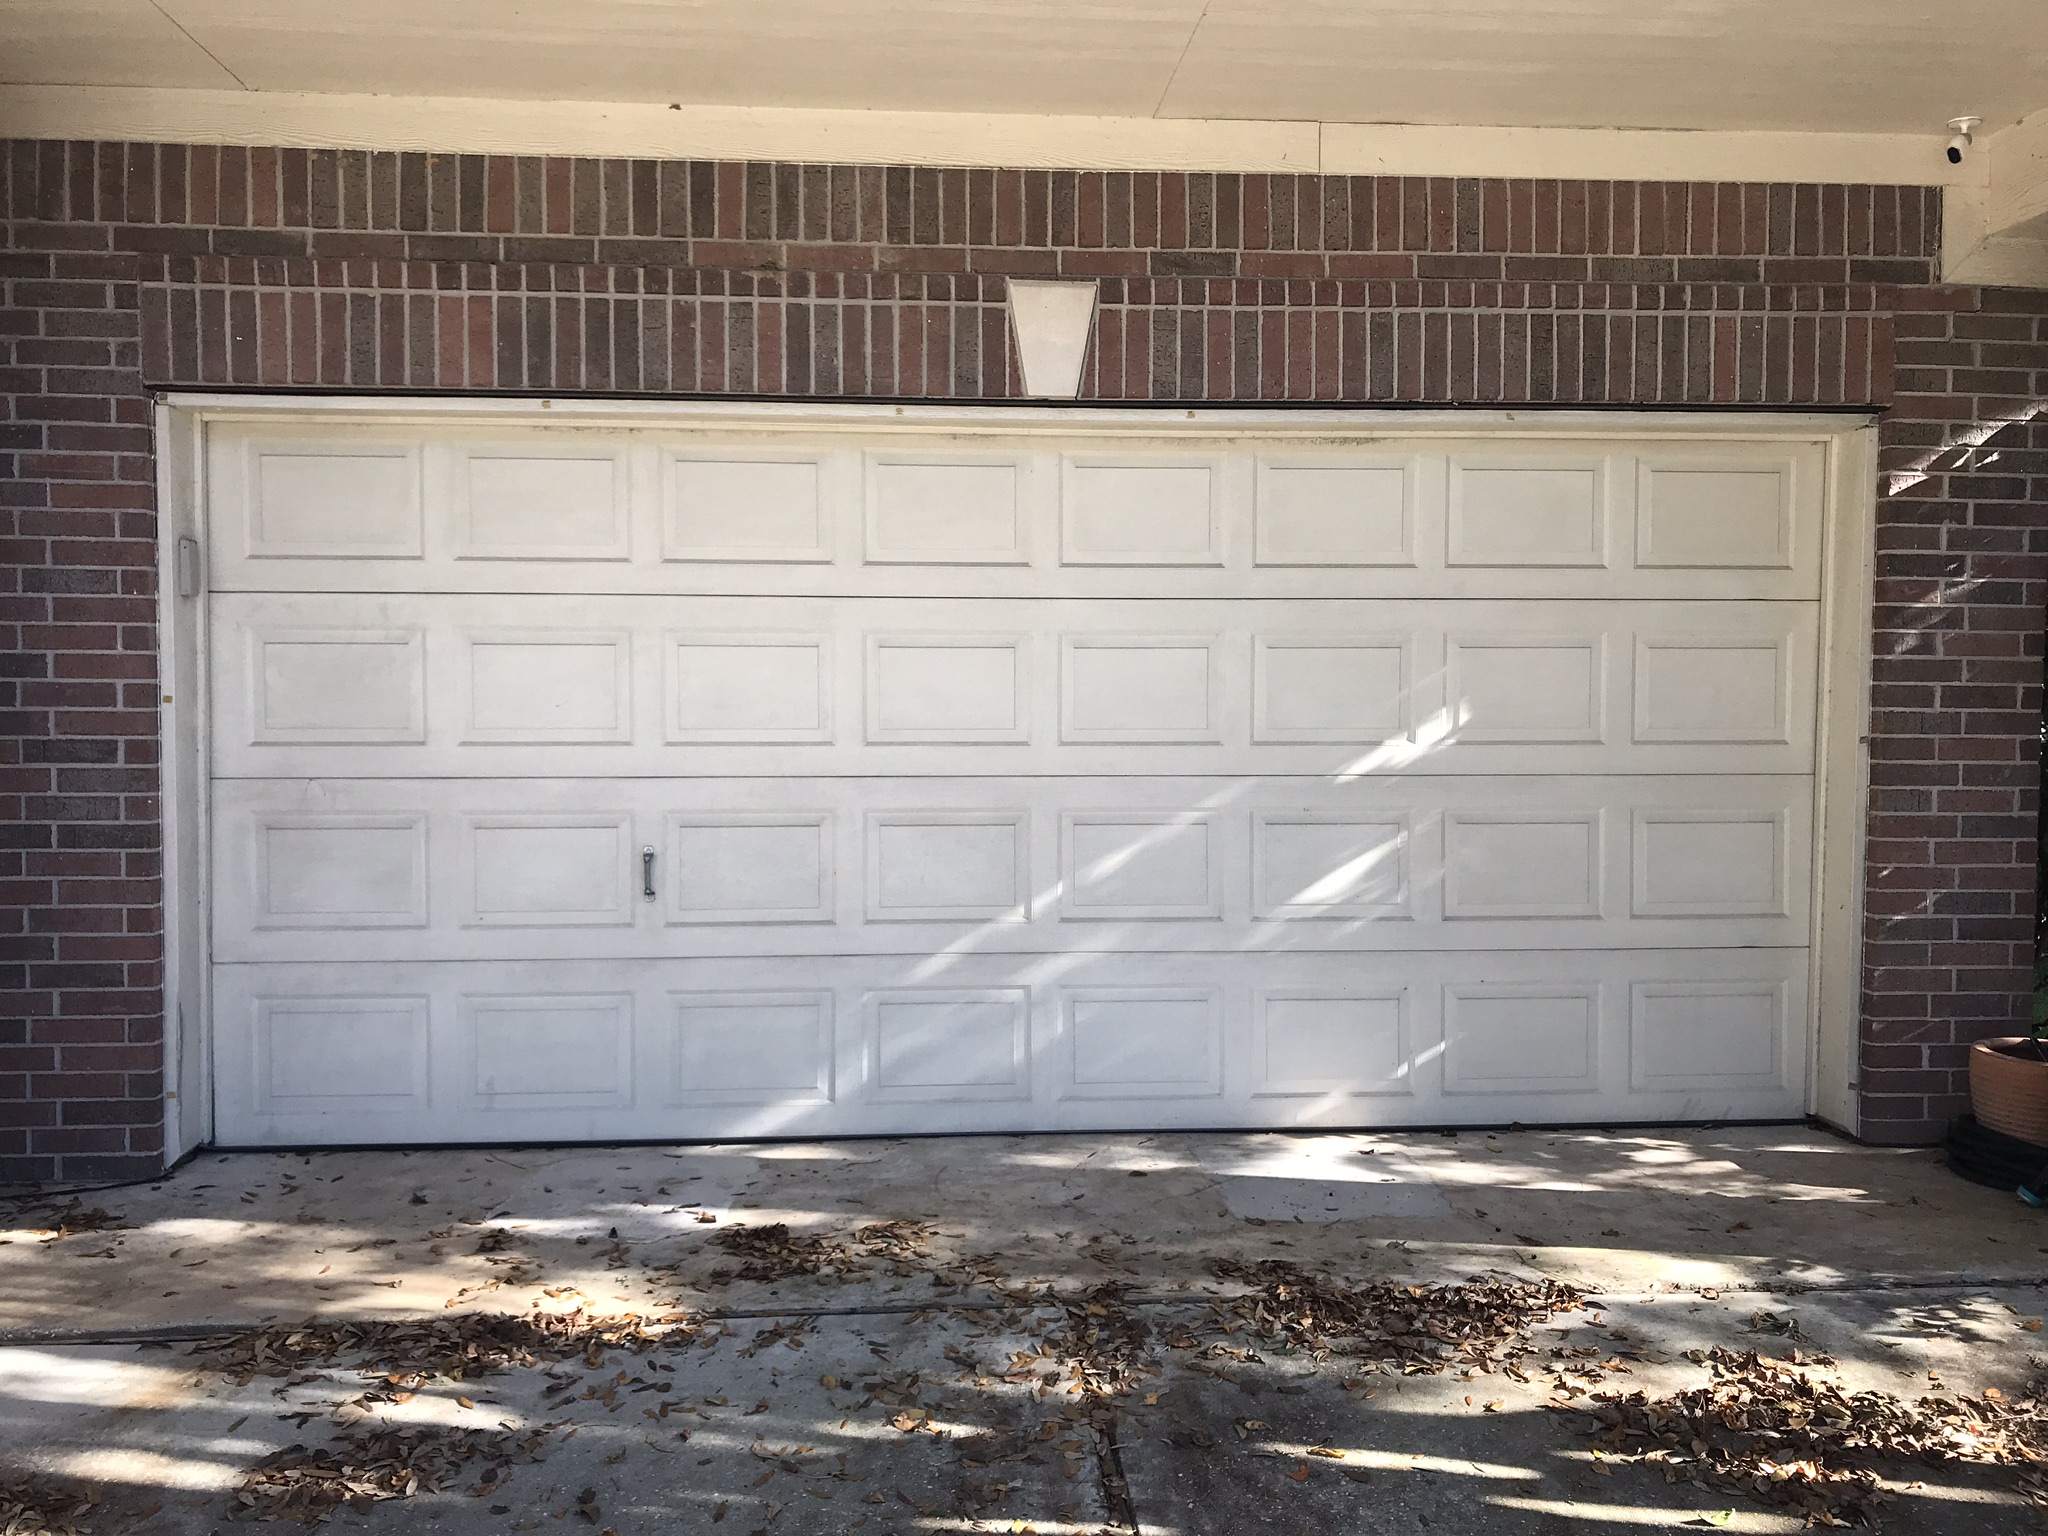
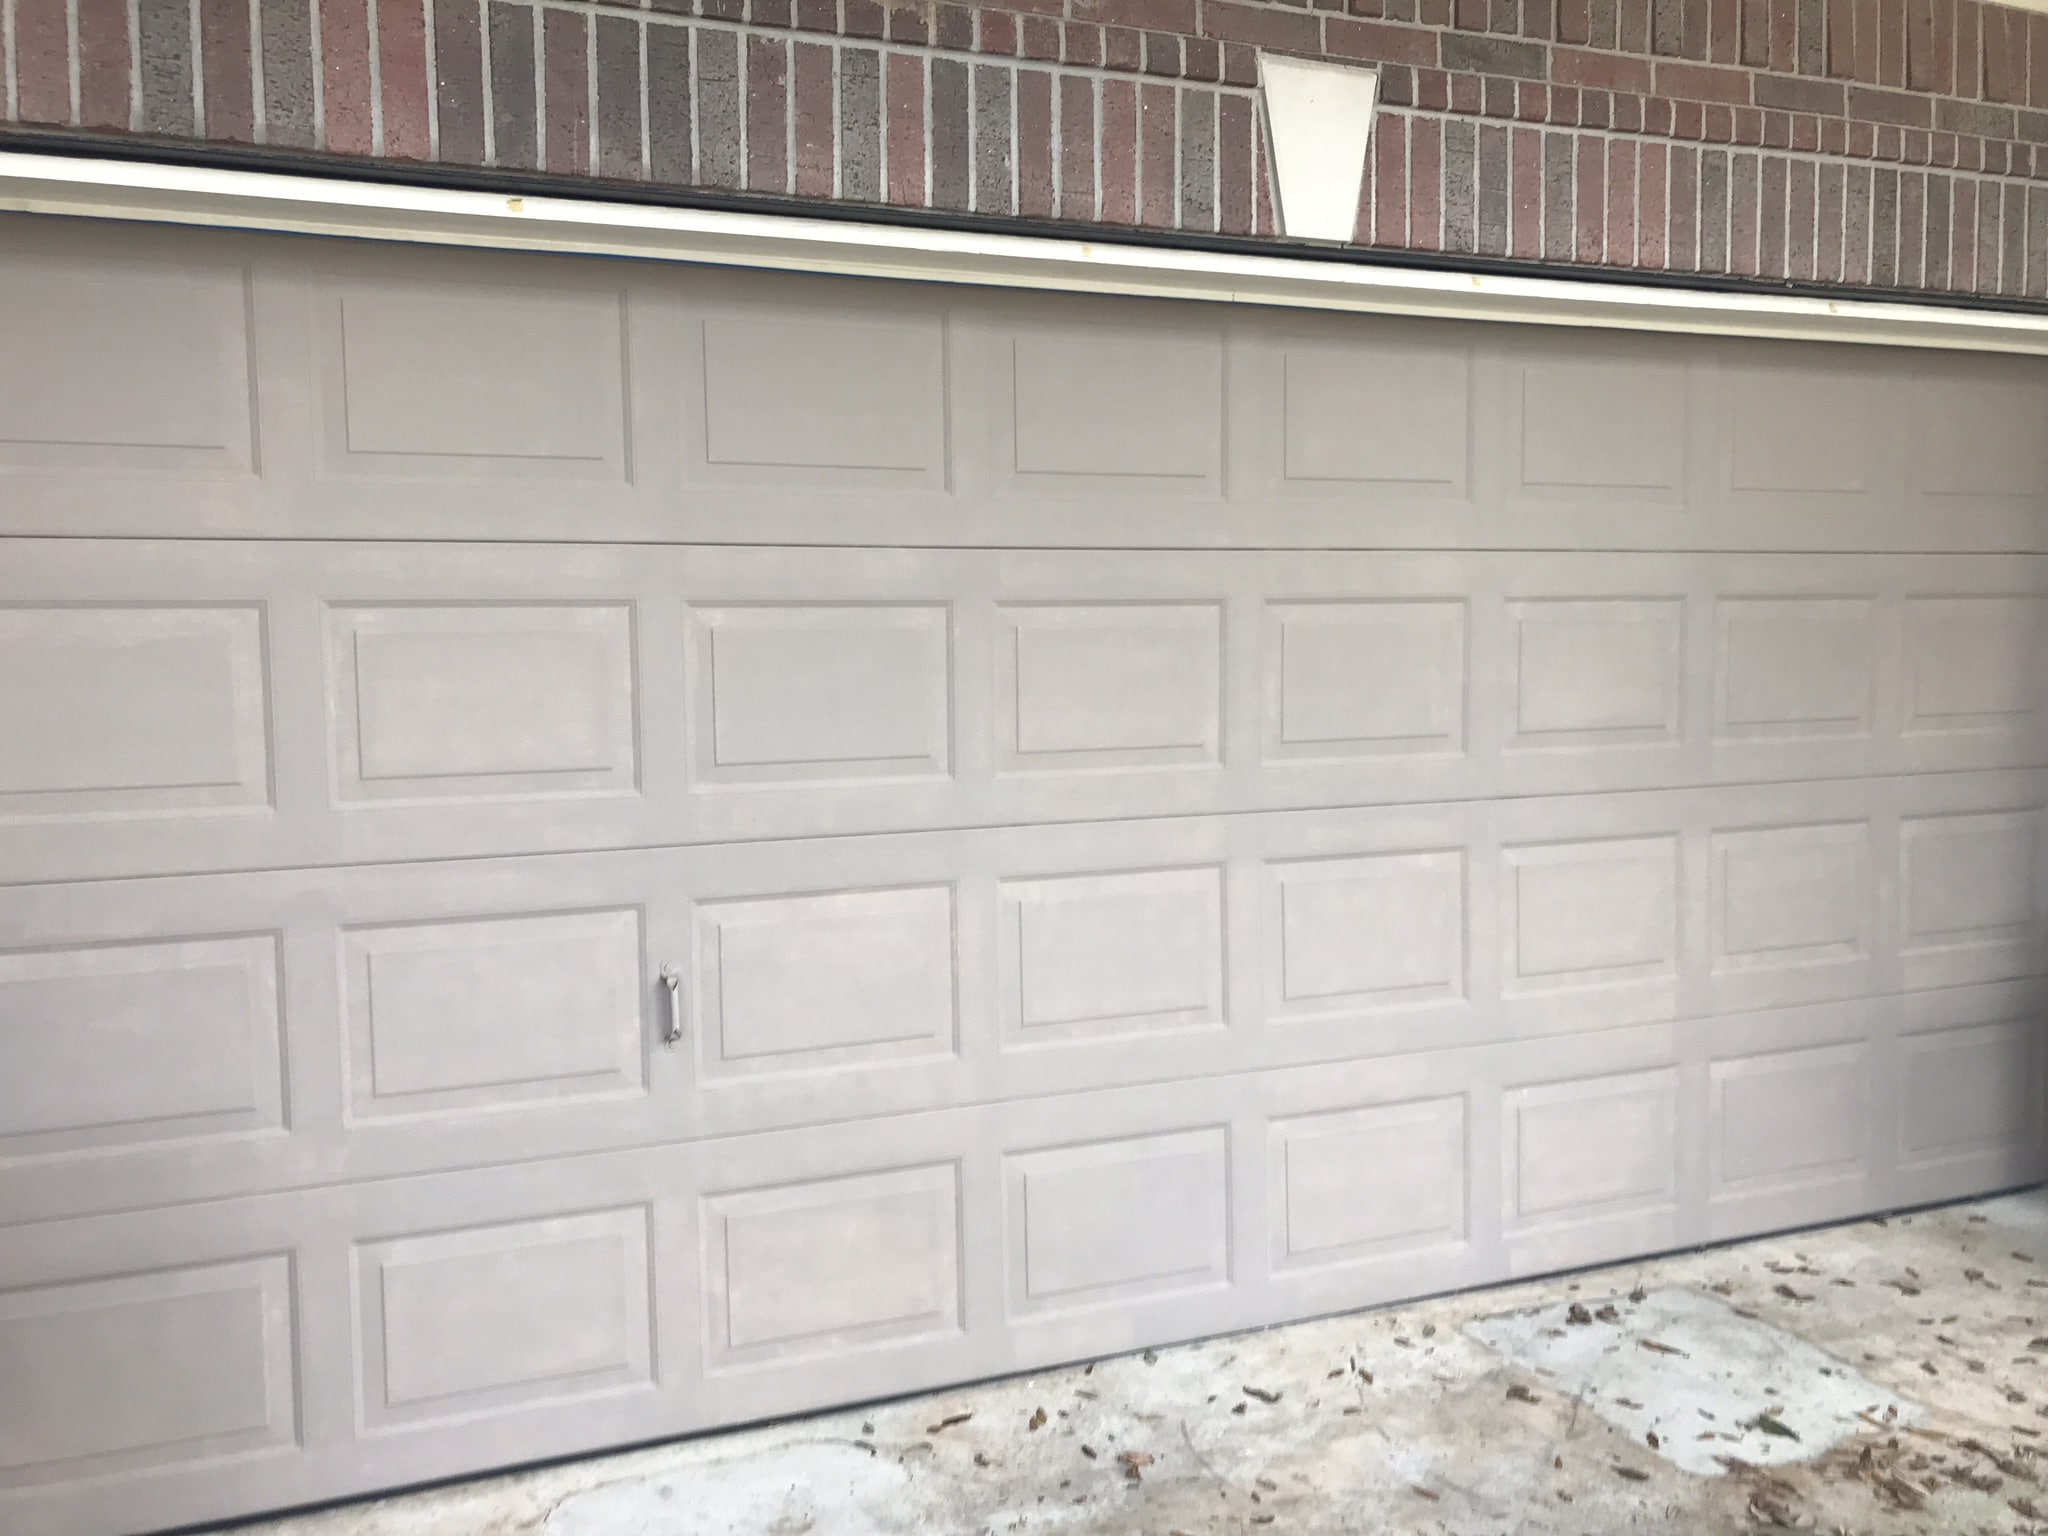
- The very first thing that needs to be done is to clean the garage door thoroughly. In order for the Chalk Paint® to properly adhere, the surface needs to be free of any dirt and oils. Once this is done and the door has dried, we can move forward to the paint.

Using the 4″ roller, apply the 1st coat of paint as evenly as possible and wait for it to dry before continuing. Door is going to need at least two coats of the Annie Sloan Chalk Paint®; and don’t worry if it looks a little patchy after the first coat as it will all come together in the end, I promise. I love this paint and use it for most of our furniture restoration projects and even kitchen cabinets. The best part of using this paint is that it dries much quicker than using any latex or oil based paints which will significantly reduce the time you spend on this project.


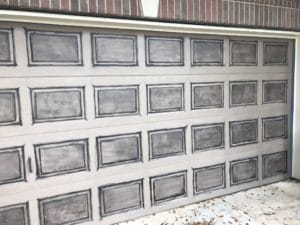
Once the second coat of the Chalk Paint® has fully dried, you need to seal it in place. If a standard paint or latex paint had been used instead, this step would not be needed. The reason why you need to seal the Chalk Paint® now is because otherwise the gel stain would blend in with the Chalk Paint® and it would give you a completely different look than what we’re going for. The Modern Masters MasterClear Supreme in Satin Finish is an excellent sealer to use for outdoor applications. Roll an even coat on the doors but not too thick as it will give it a milky white look if too much is used. Let it dry for a few hours or overnight before moving on to the next step.
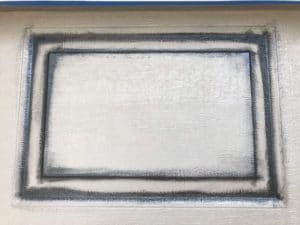
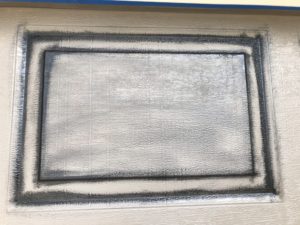
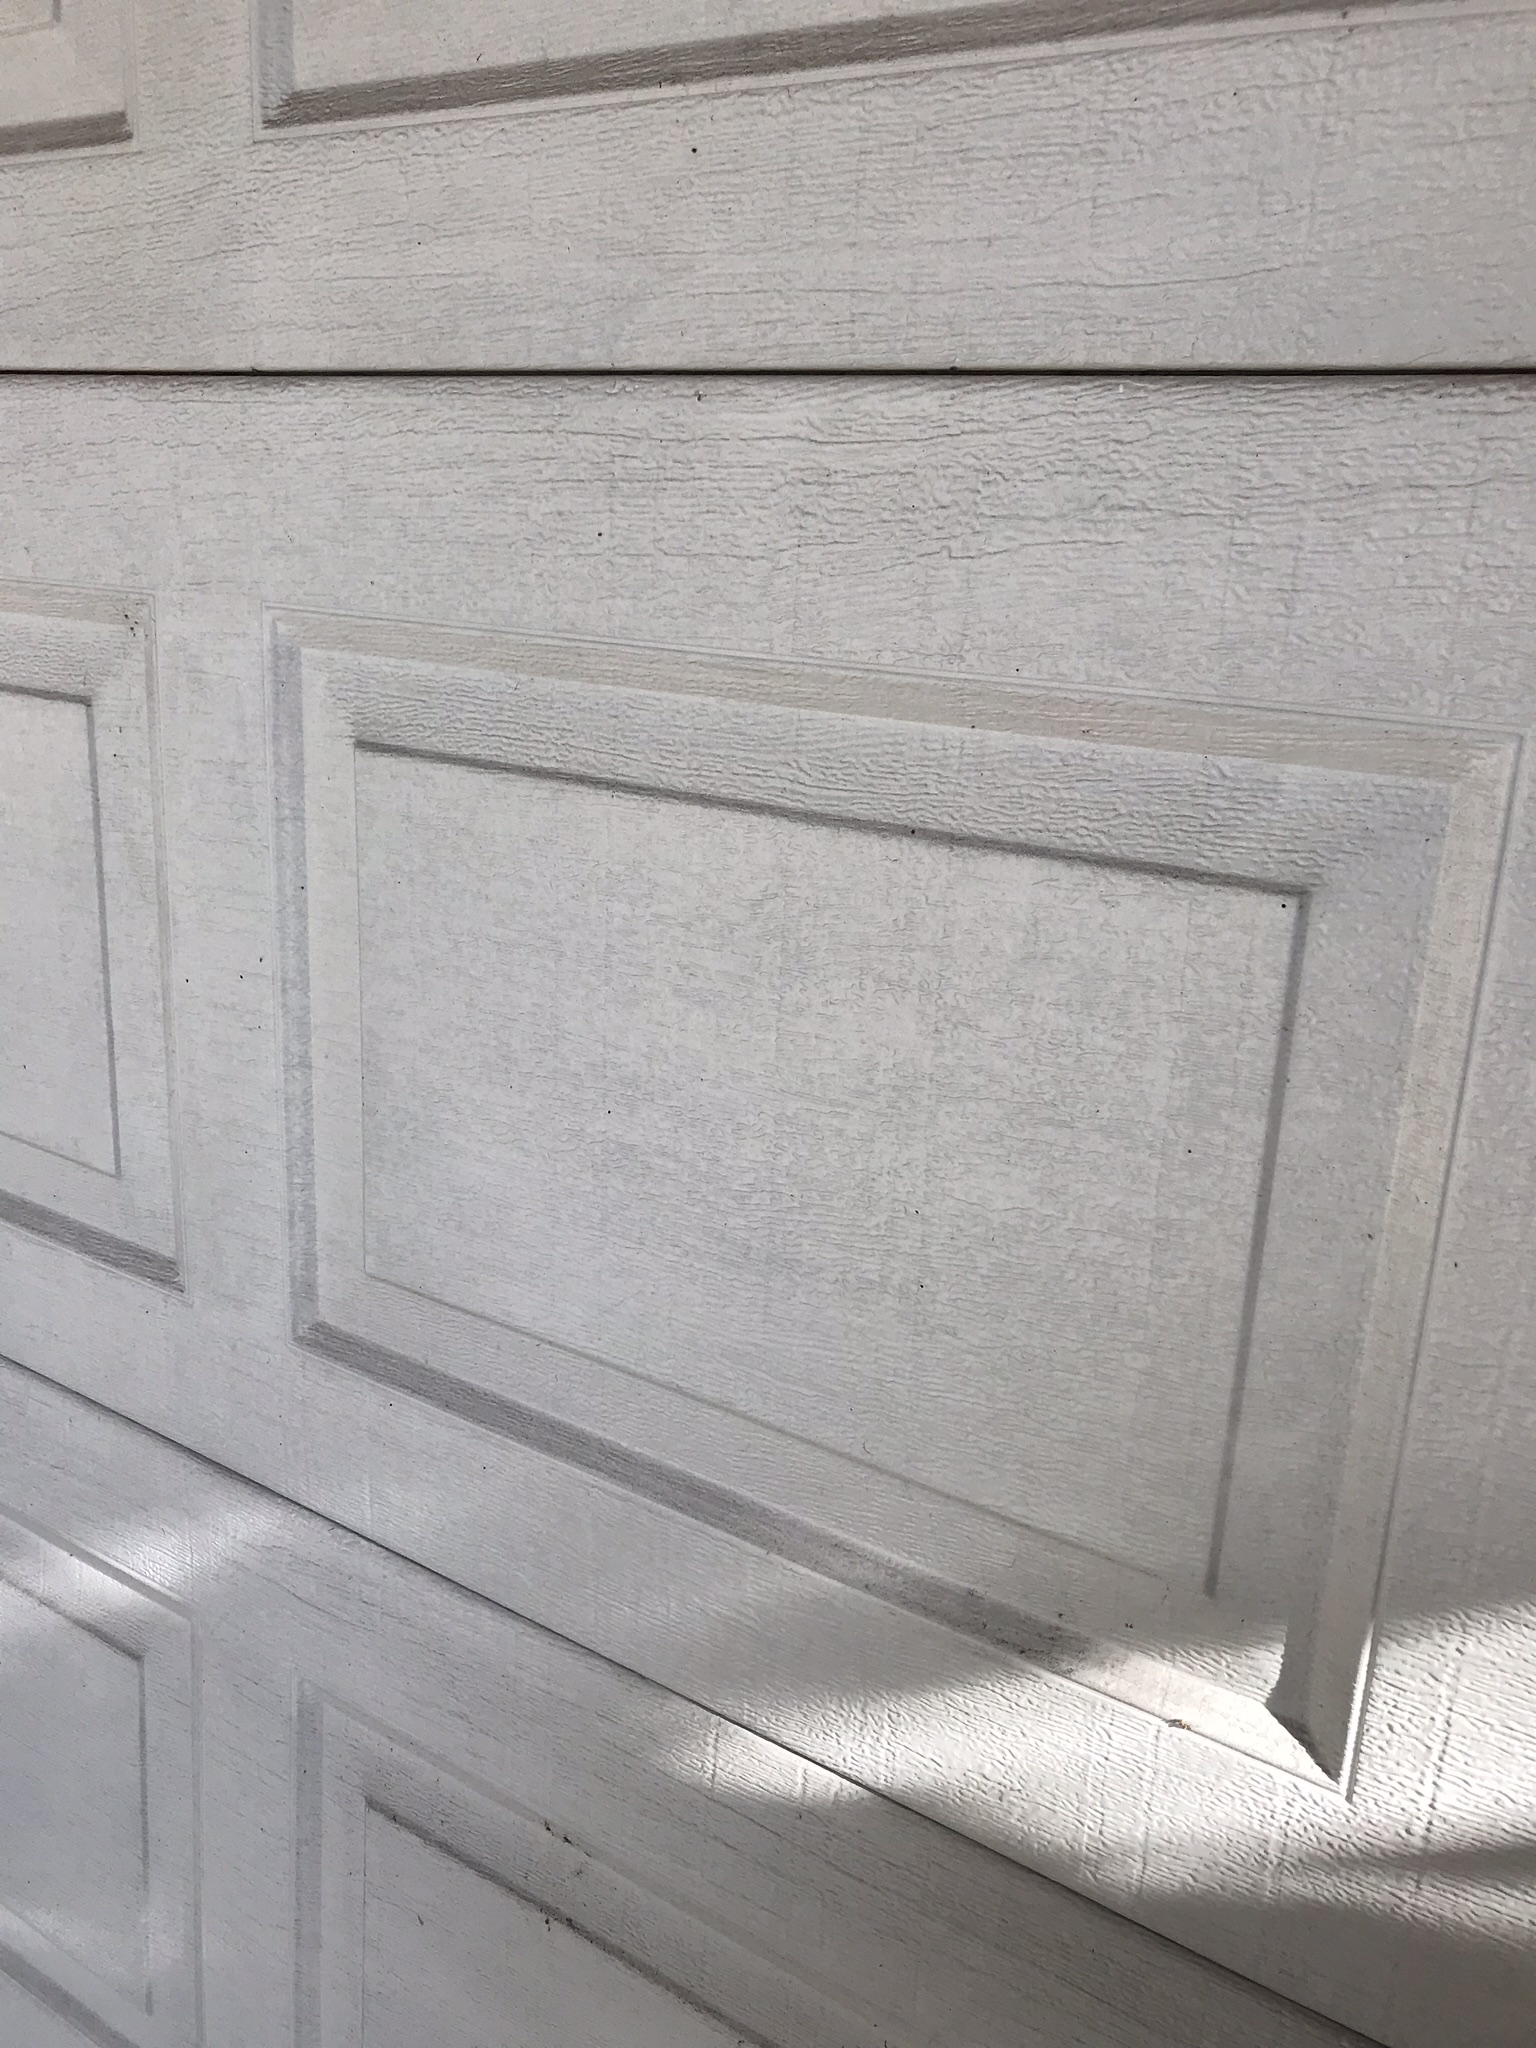
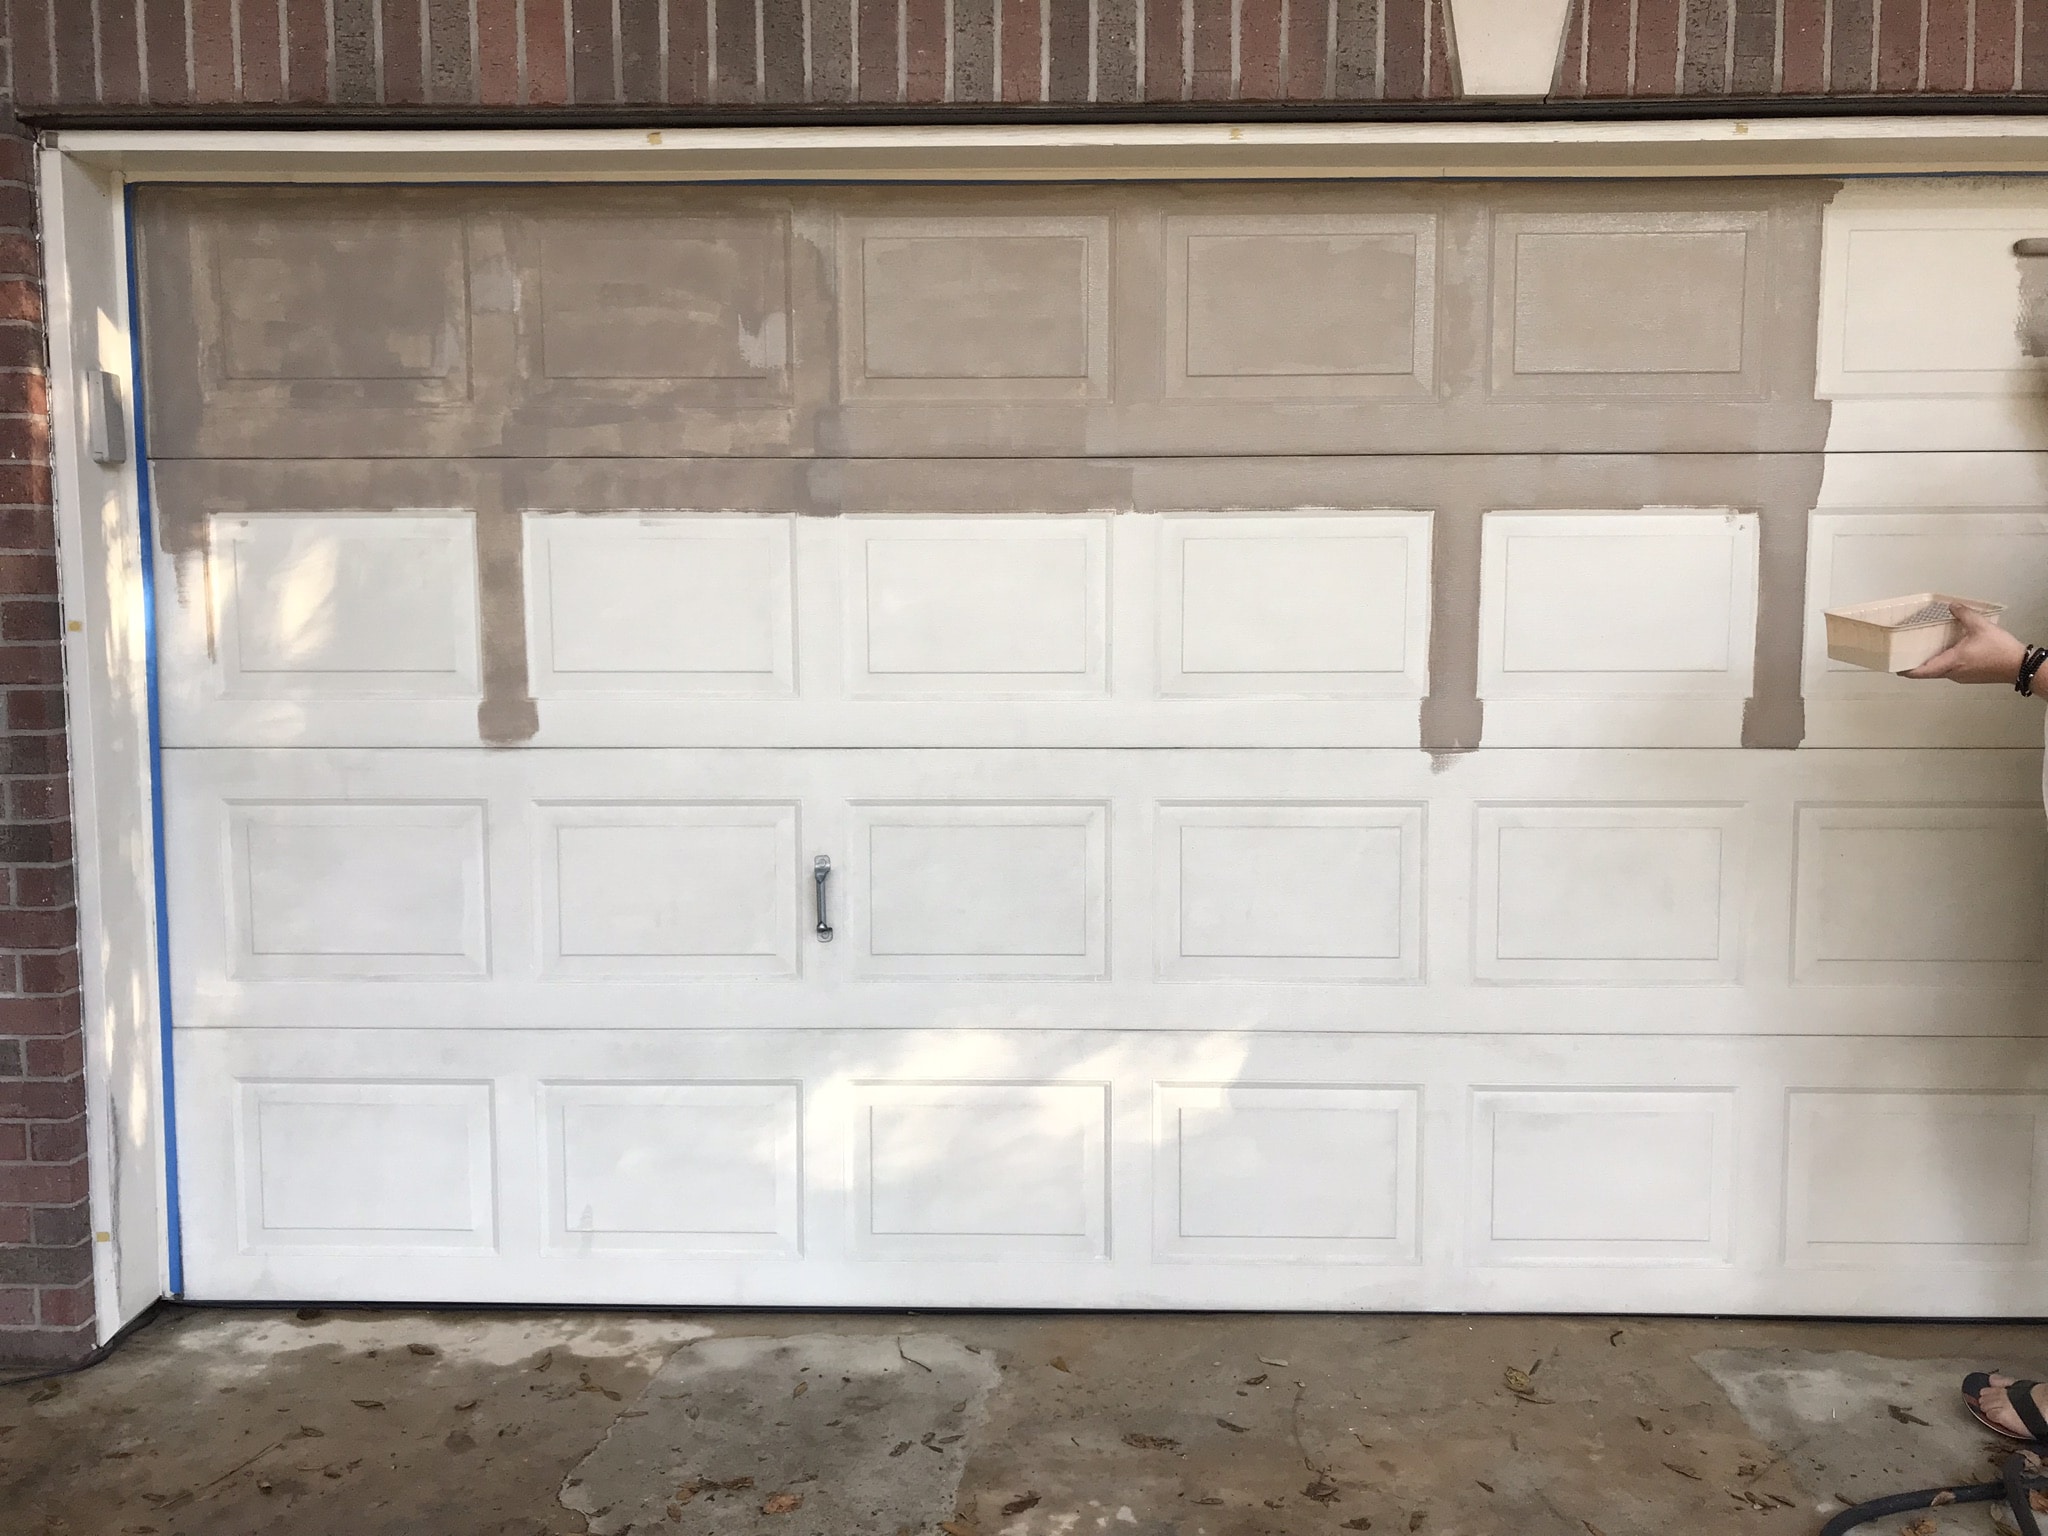
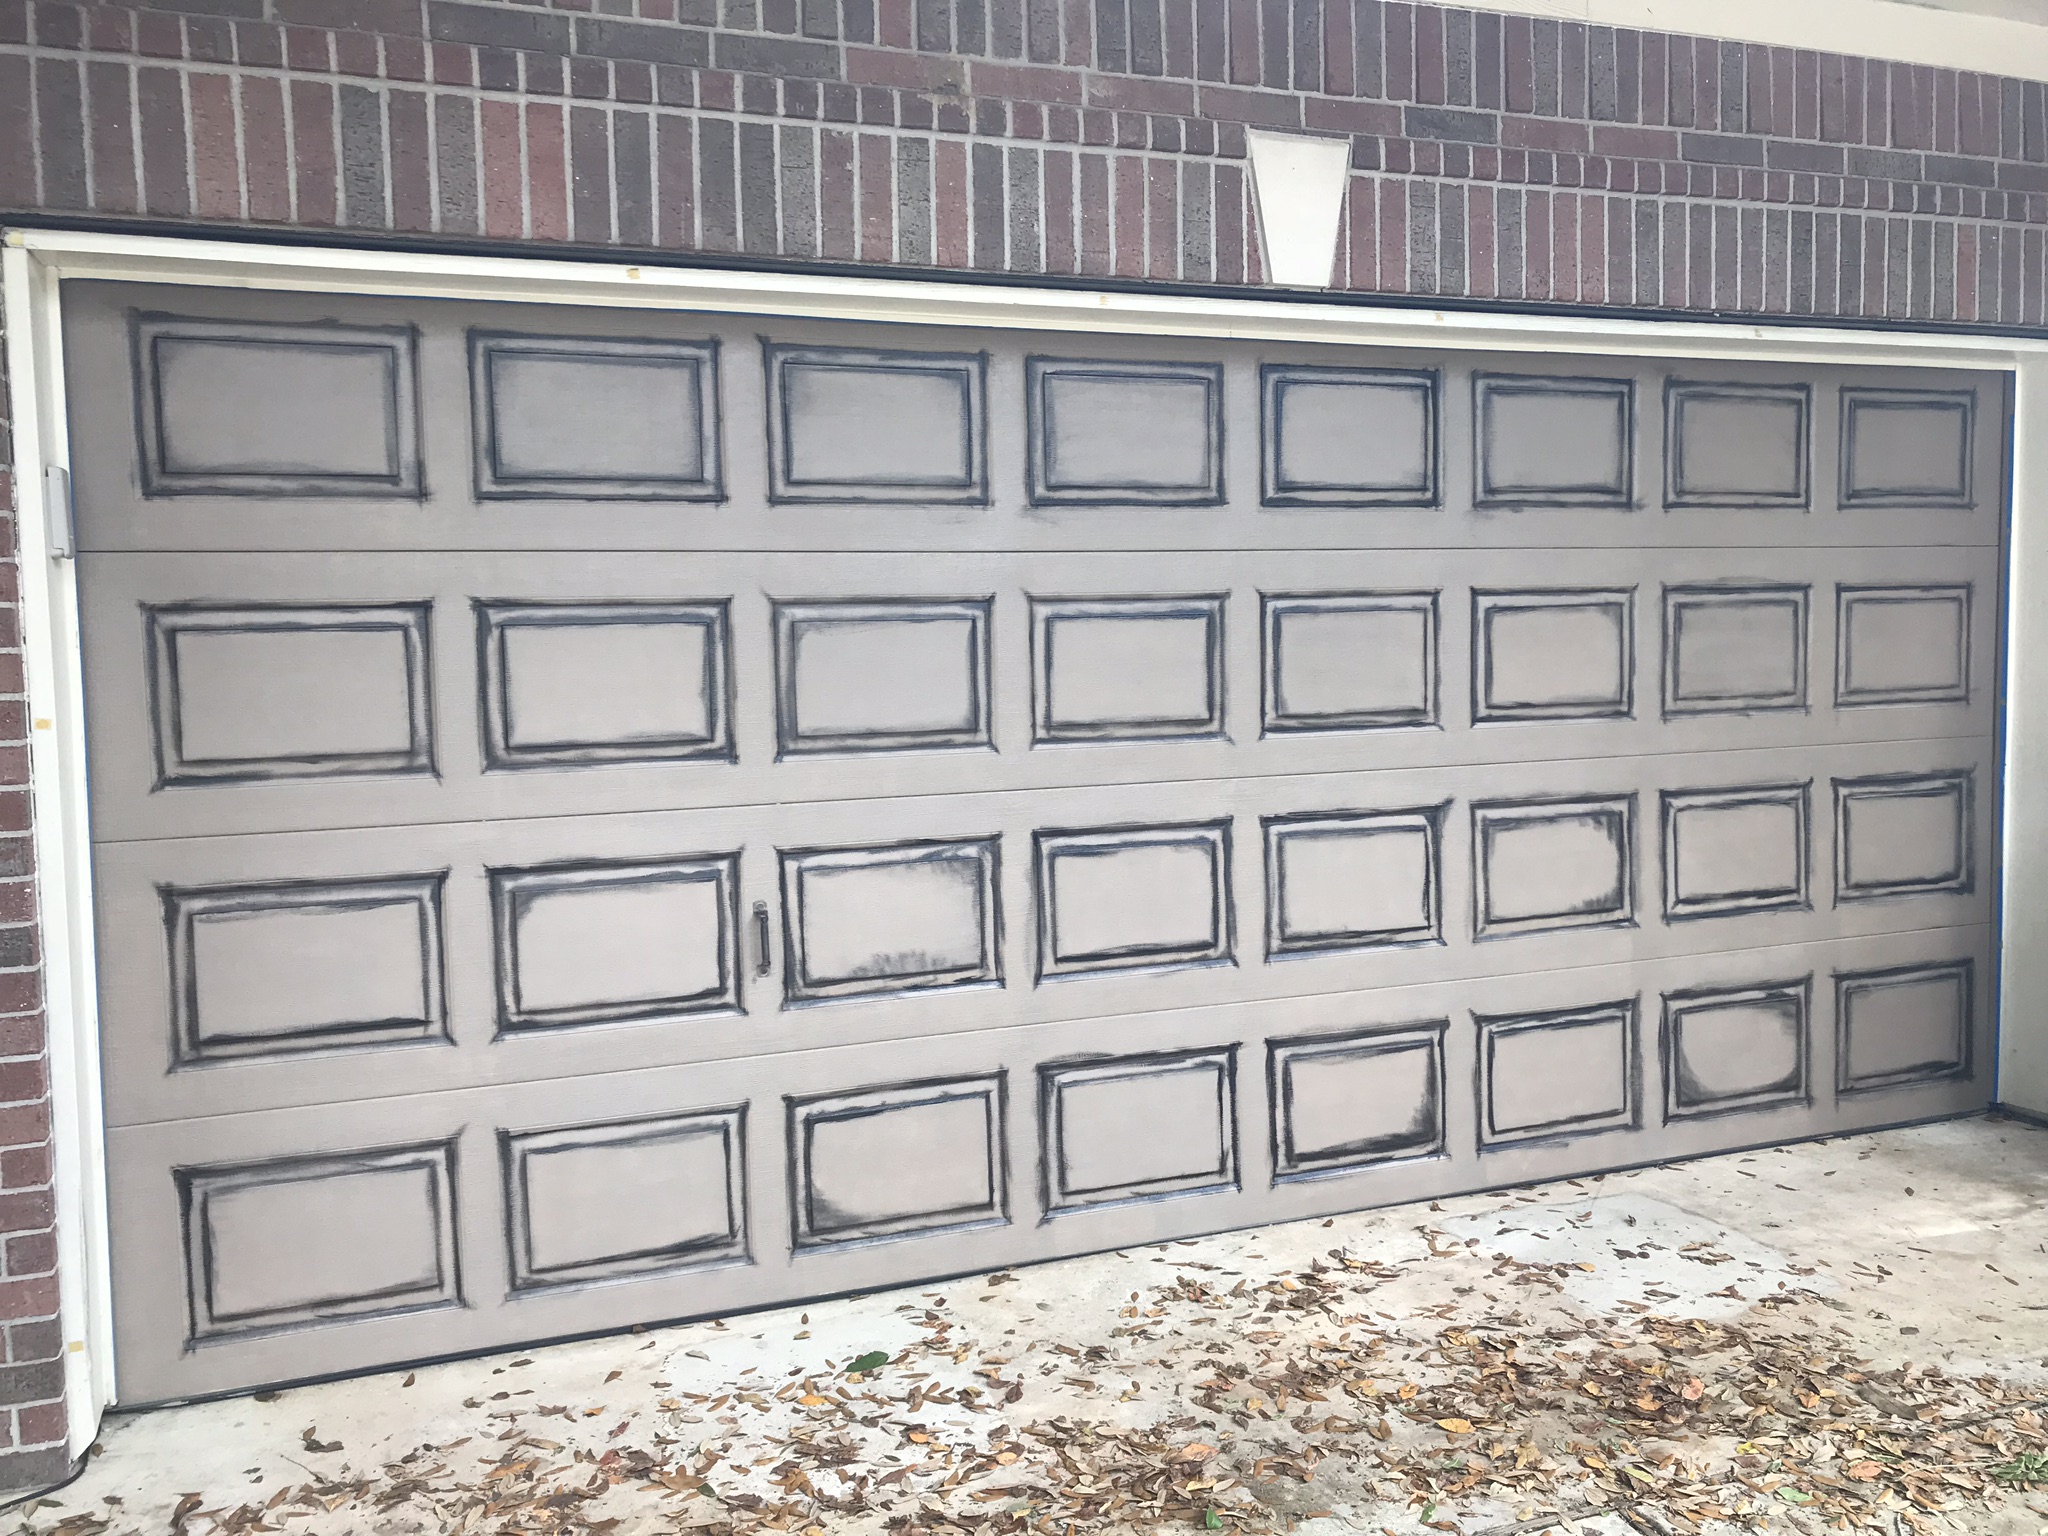
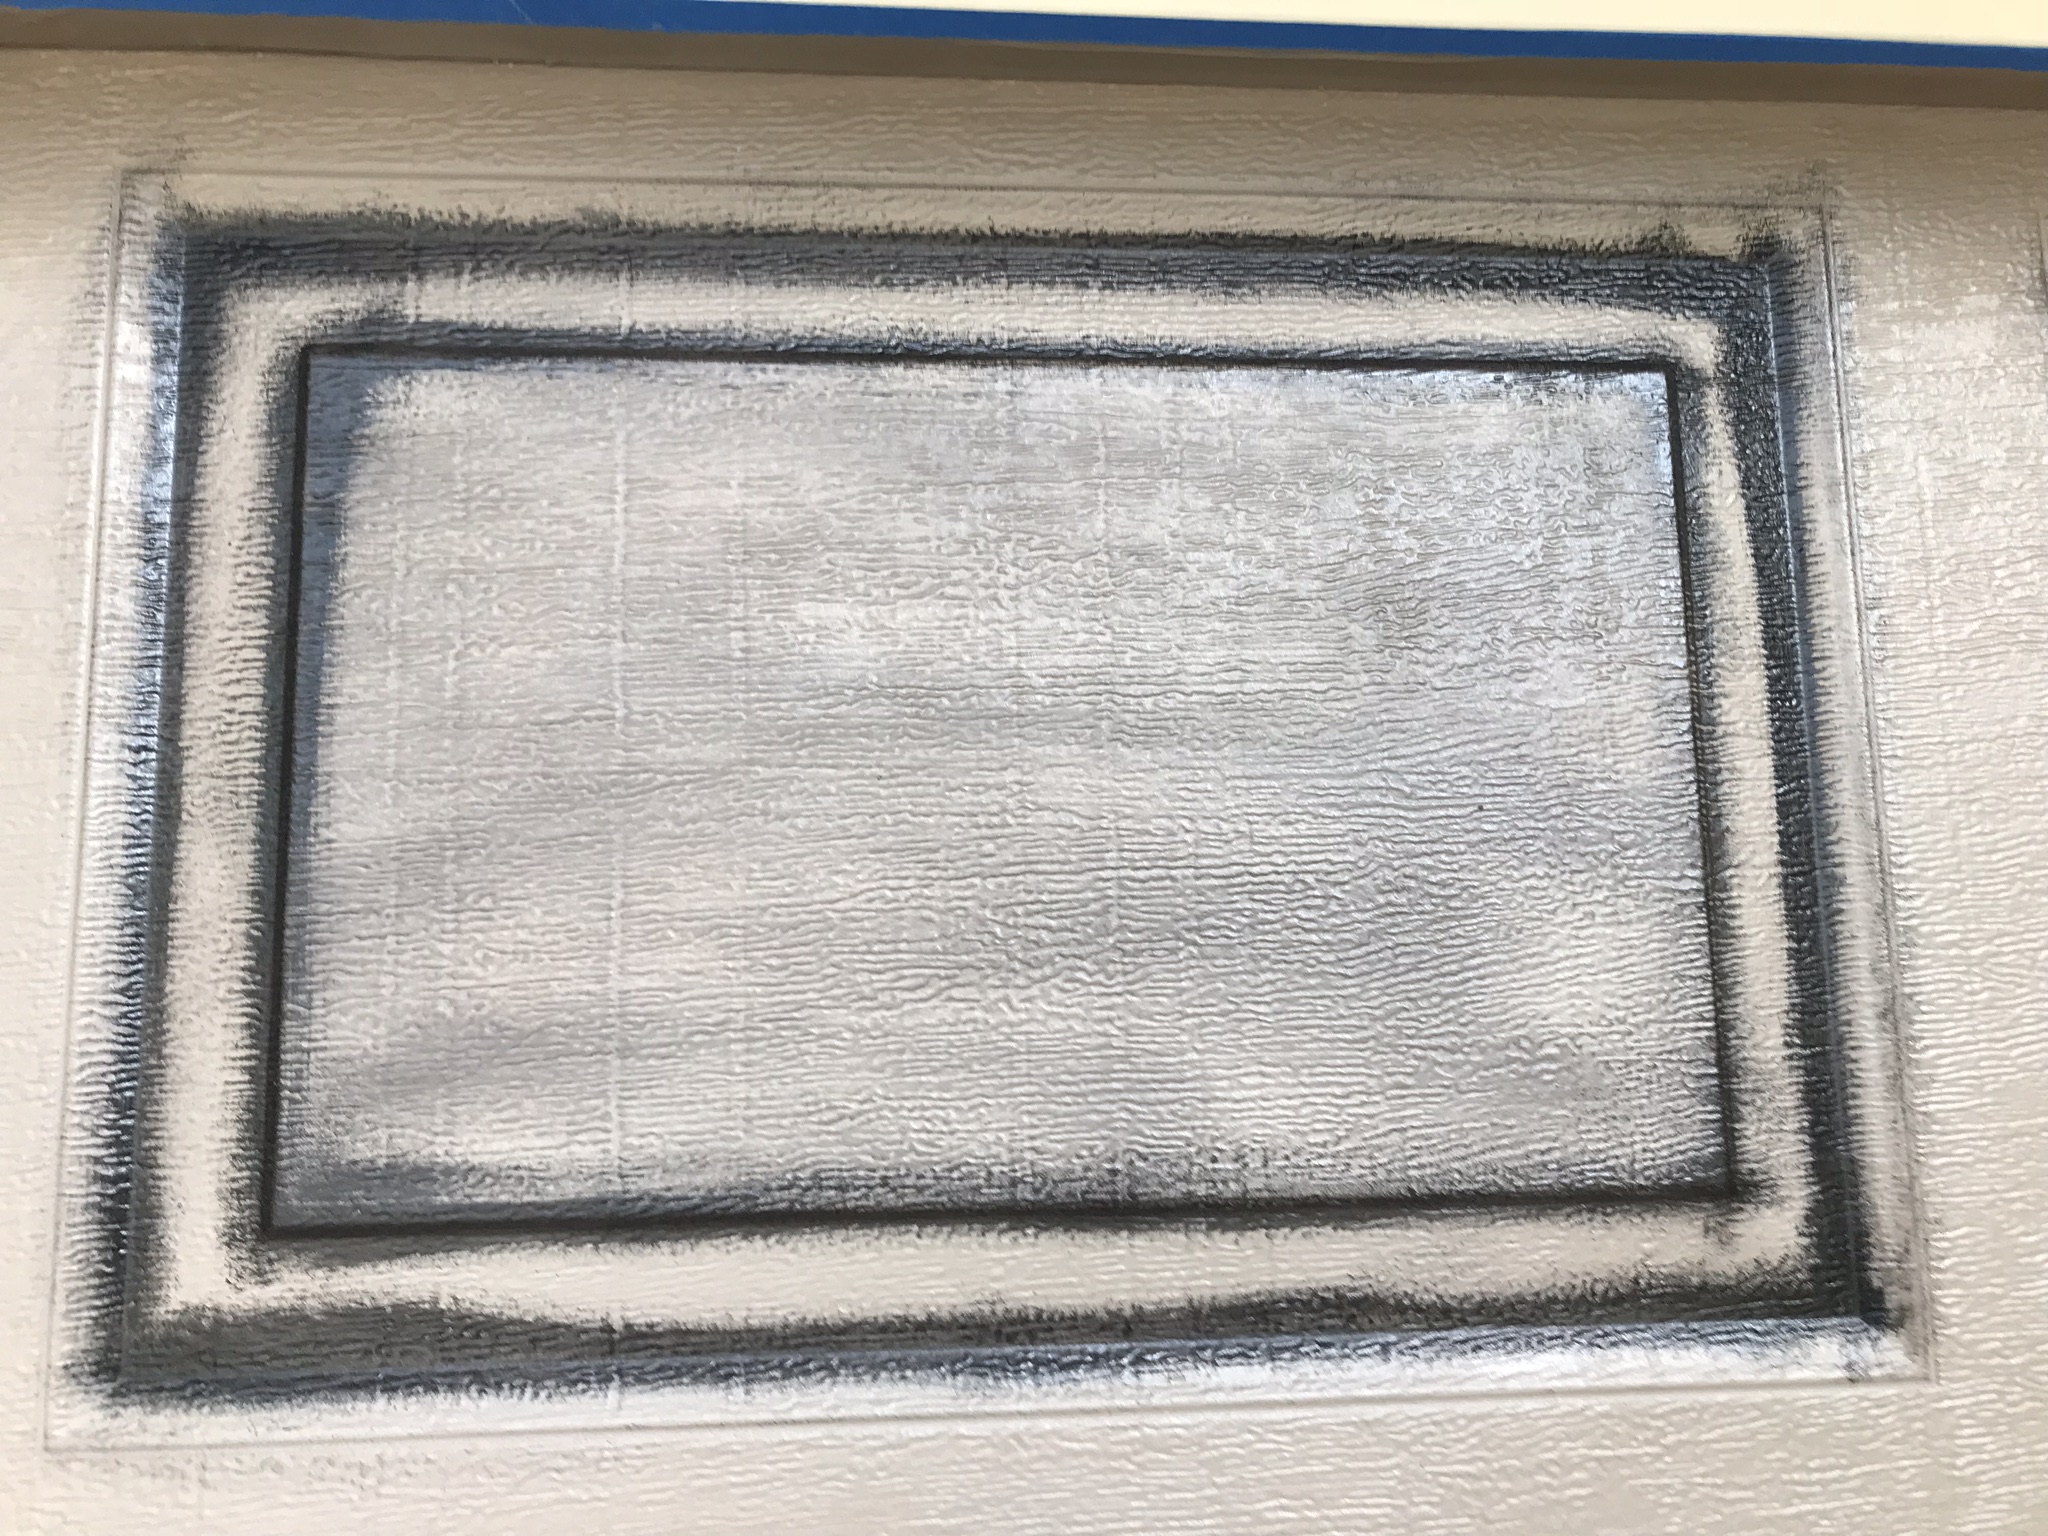
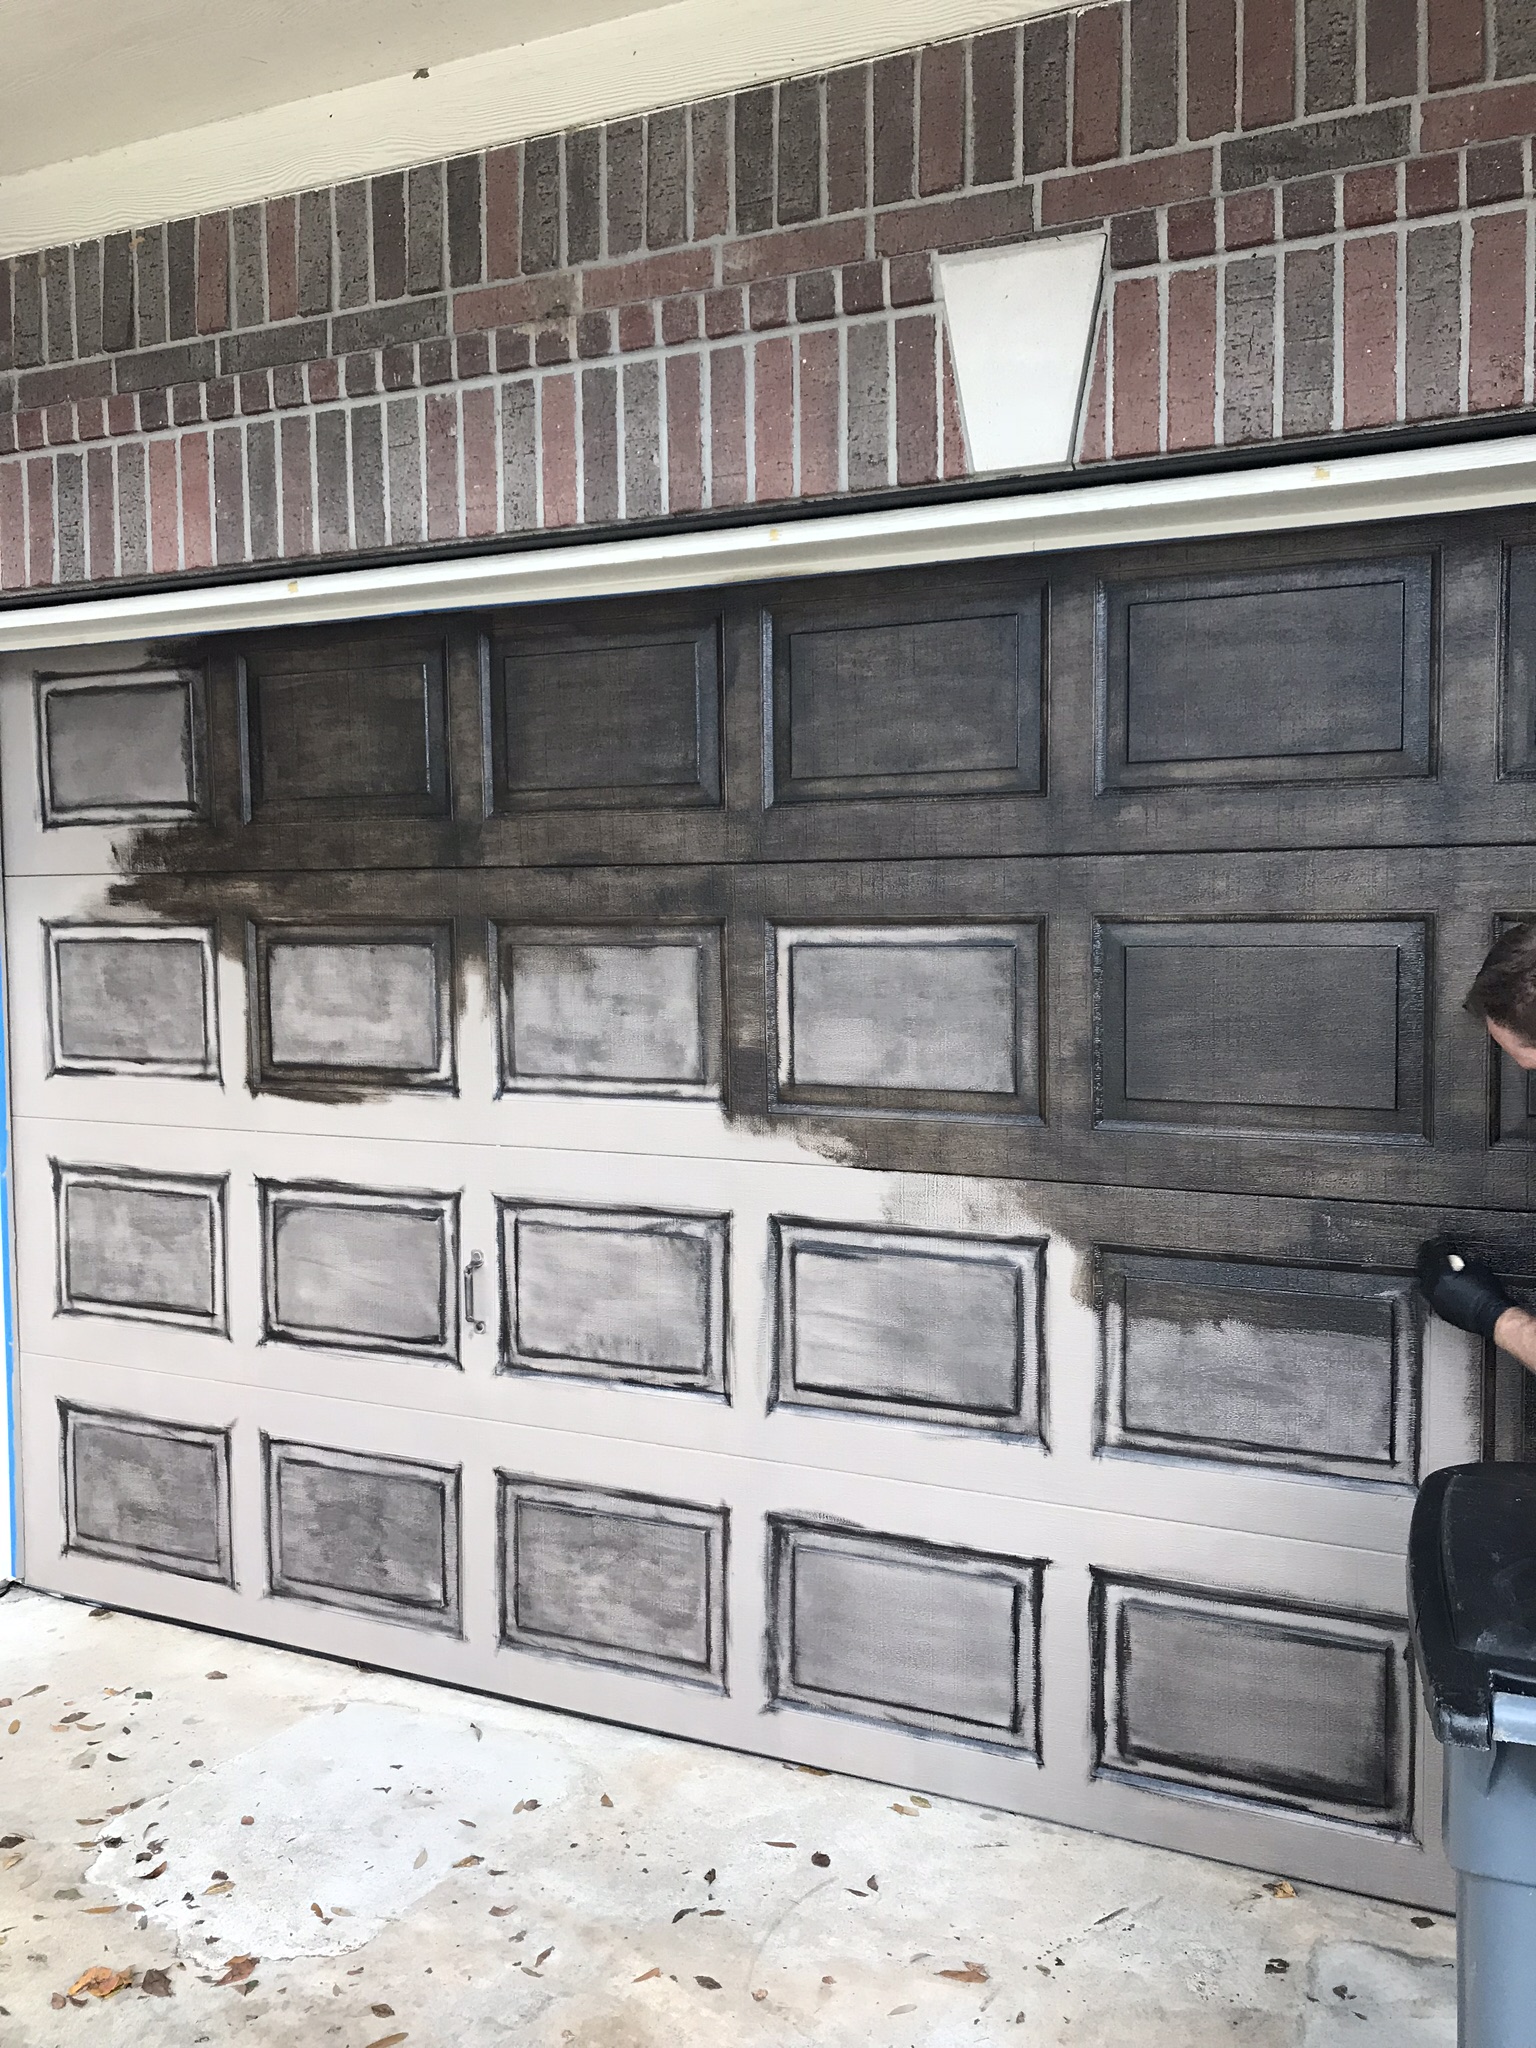
- Once it’s dry, the 1st stain can be applied. The Old Masters Gel Stain are oil based, so be careful because they will stain your clothes and everything else and can be very hard to remove. A little goes a long way, so put on your latex or nitrile gloves and get ready to have some fun. The first stain applied was the Spanish Oak which is a dark brown, almost black stain. With the chip brush we applied the stain around the garage door panel recesses to create more dimension and give the illusion of depth. If you apply too much stain, you can wipe it off and blend it in with the cheese cloth so that it goes on smooth. It doesn’t have to look perfect so don’t freak out if it starts to look a bit messy. We also darkened a bit the front of the panel for some more contrast.
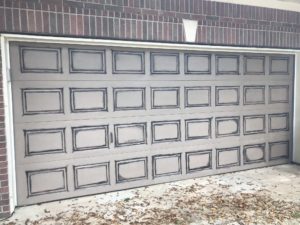
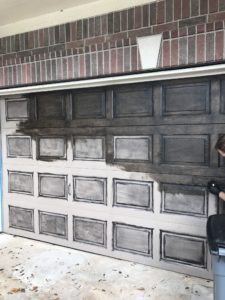
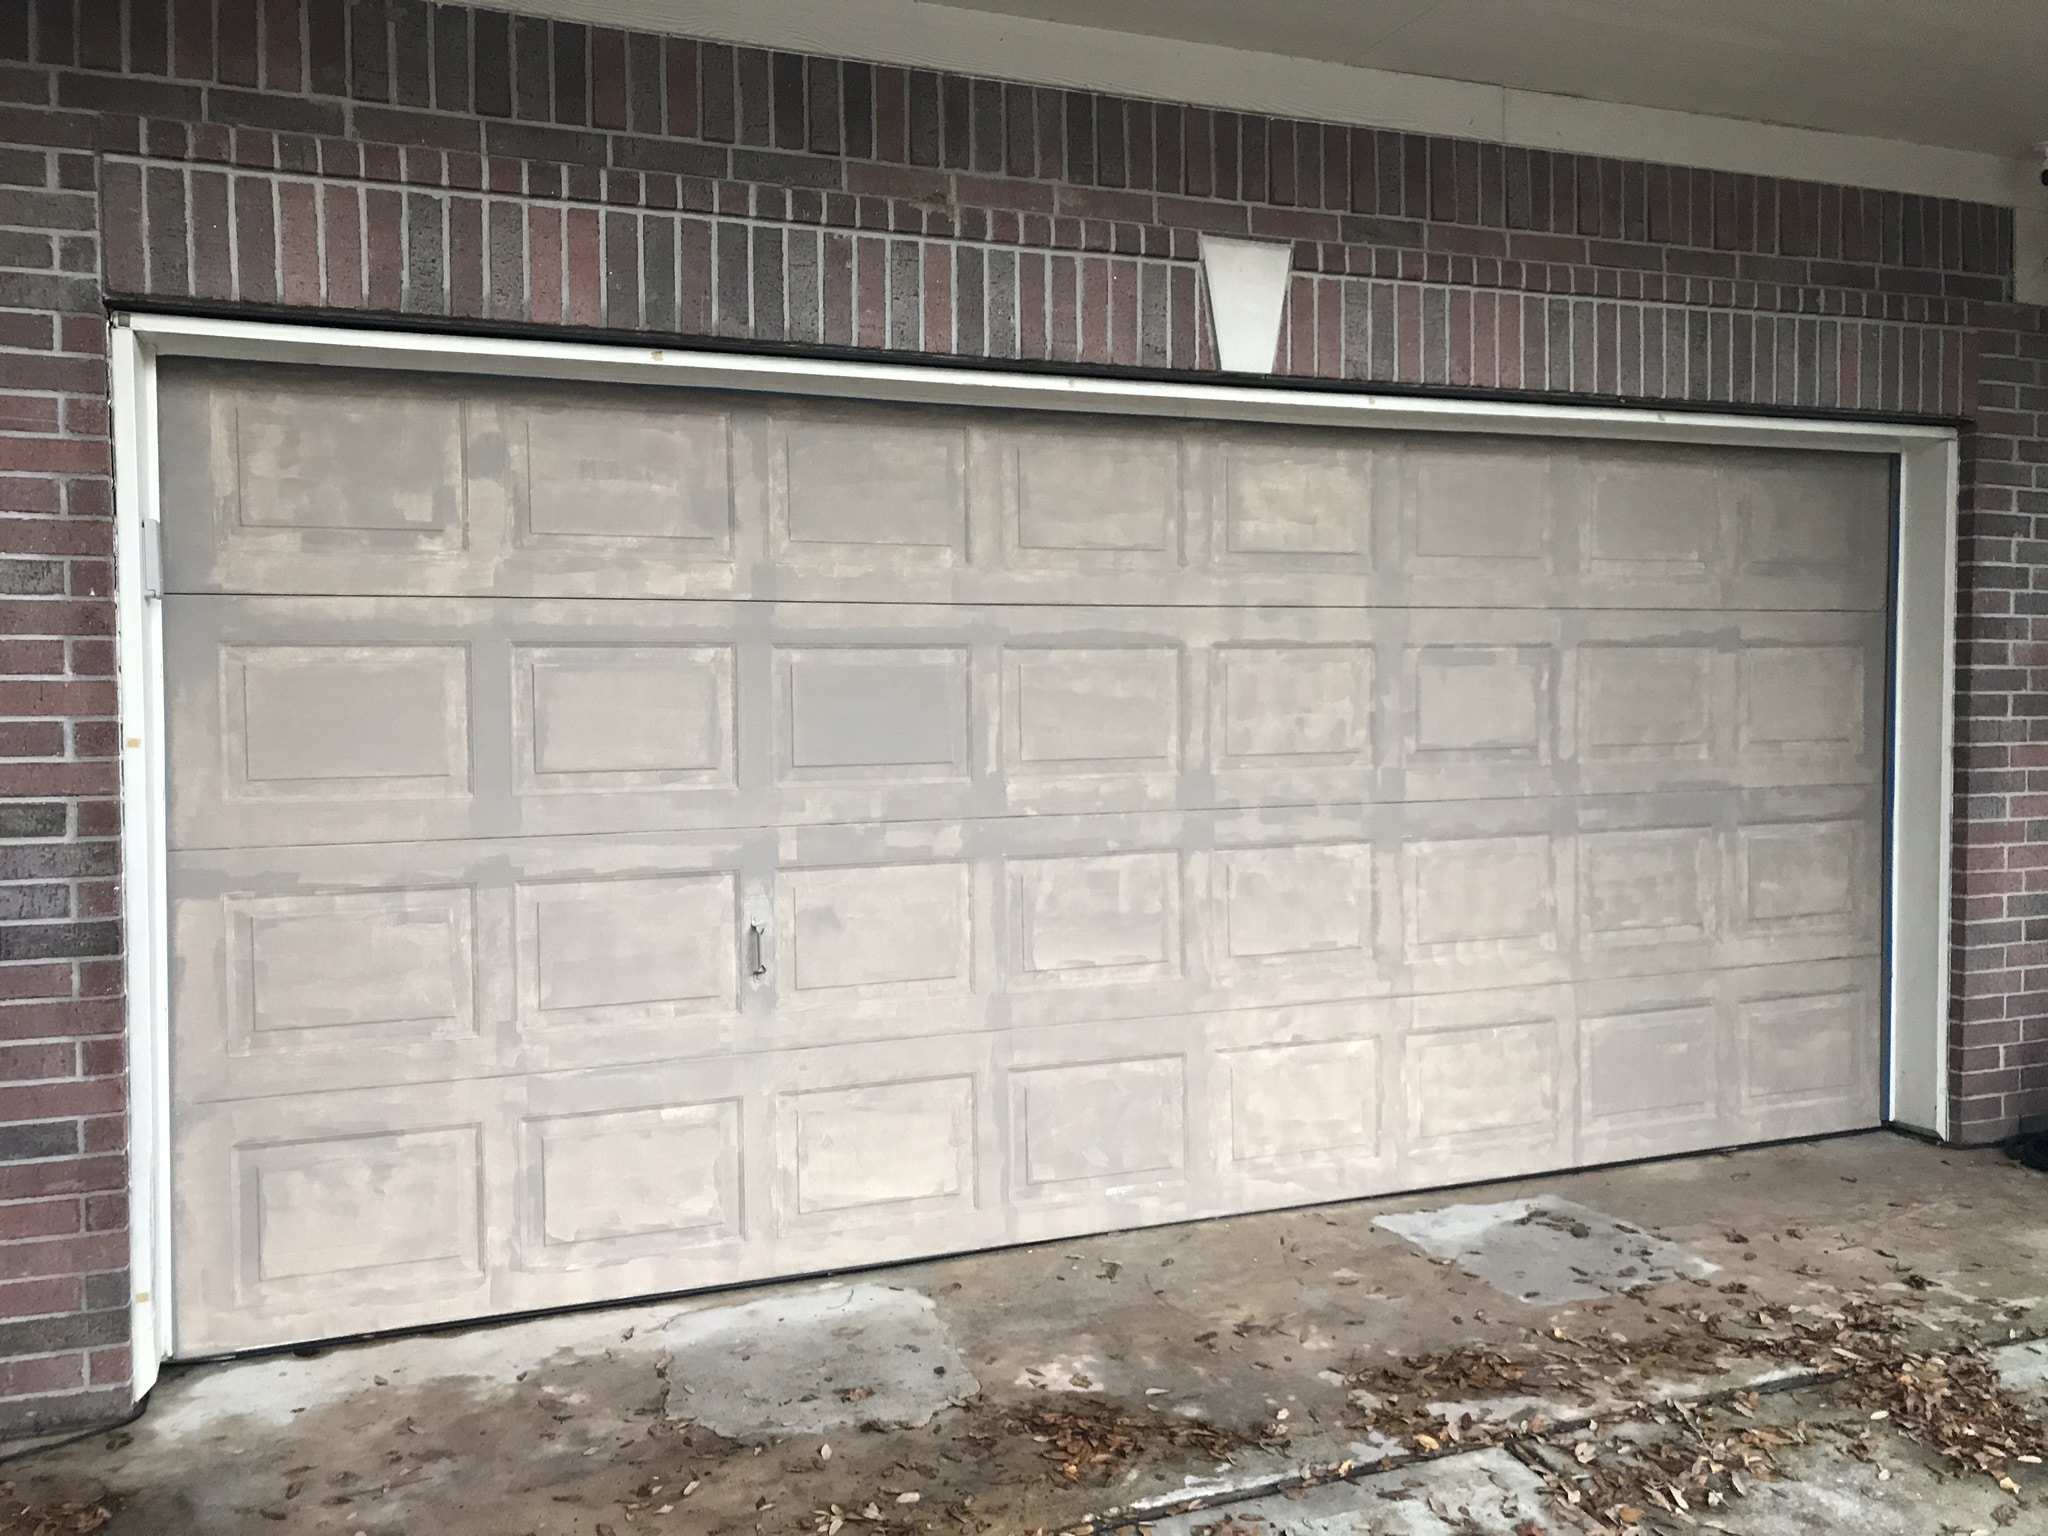
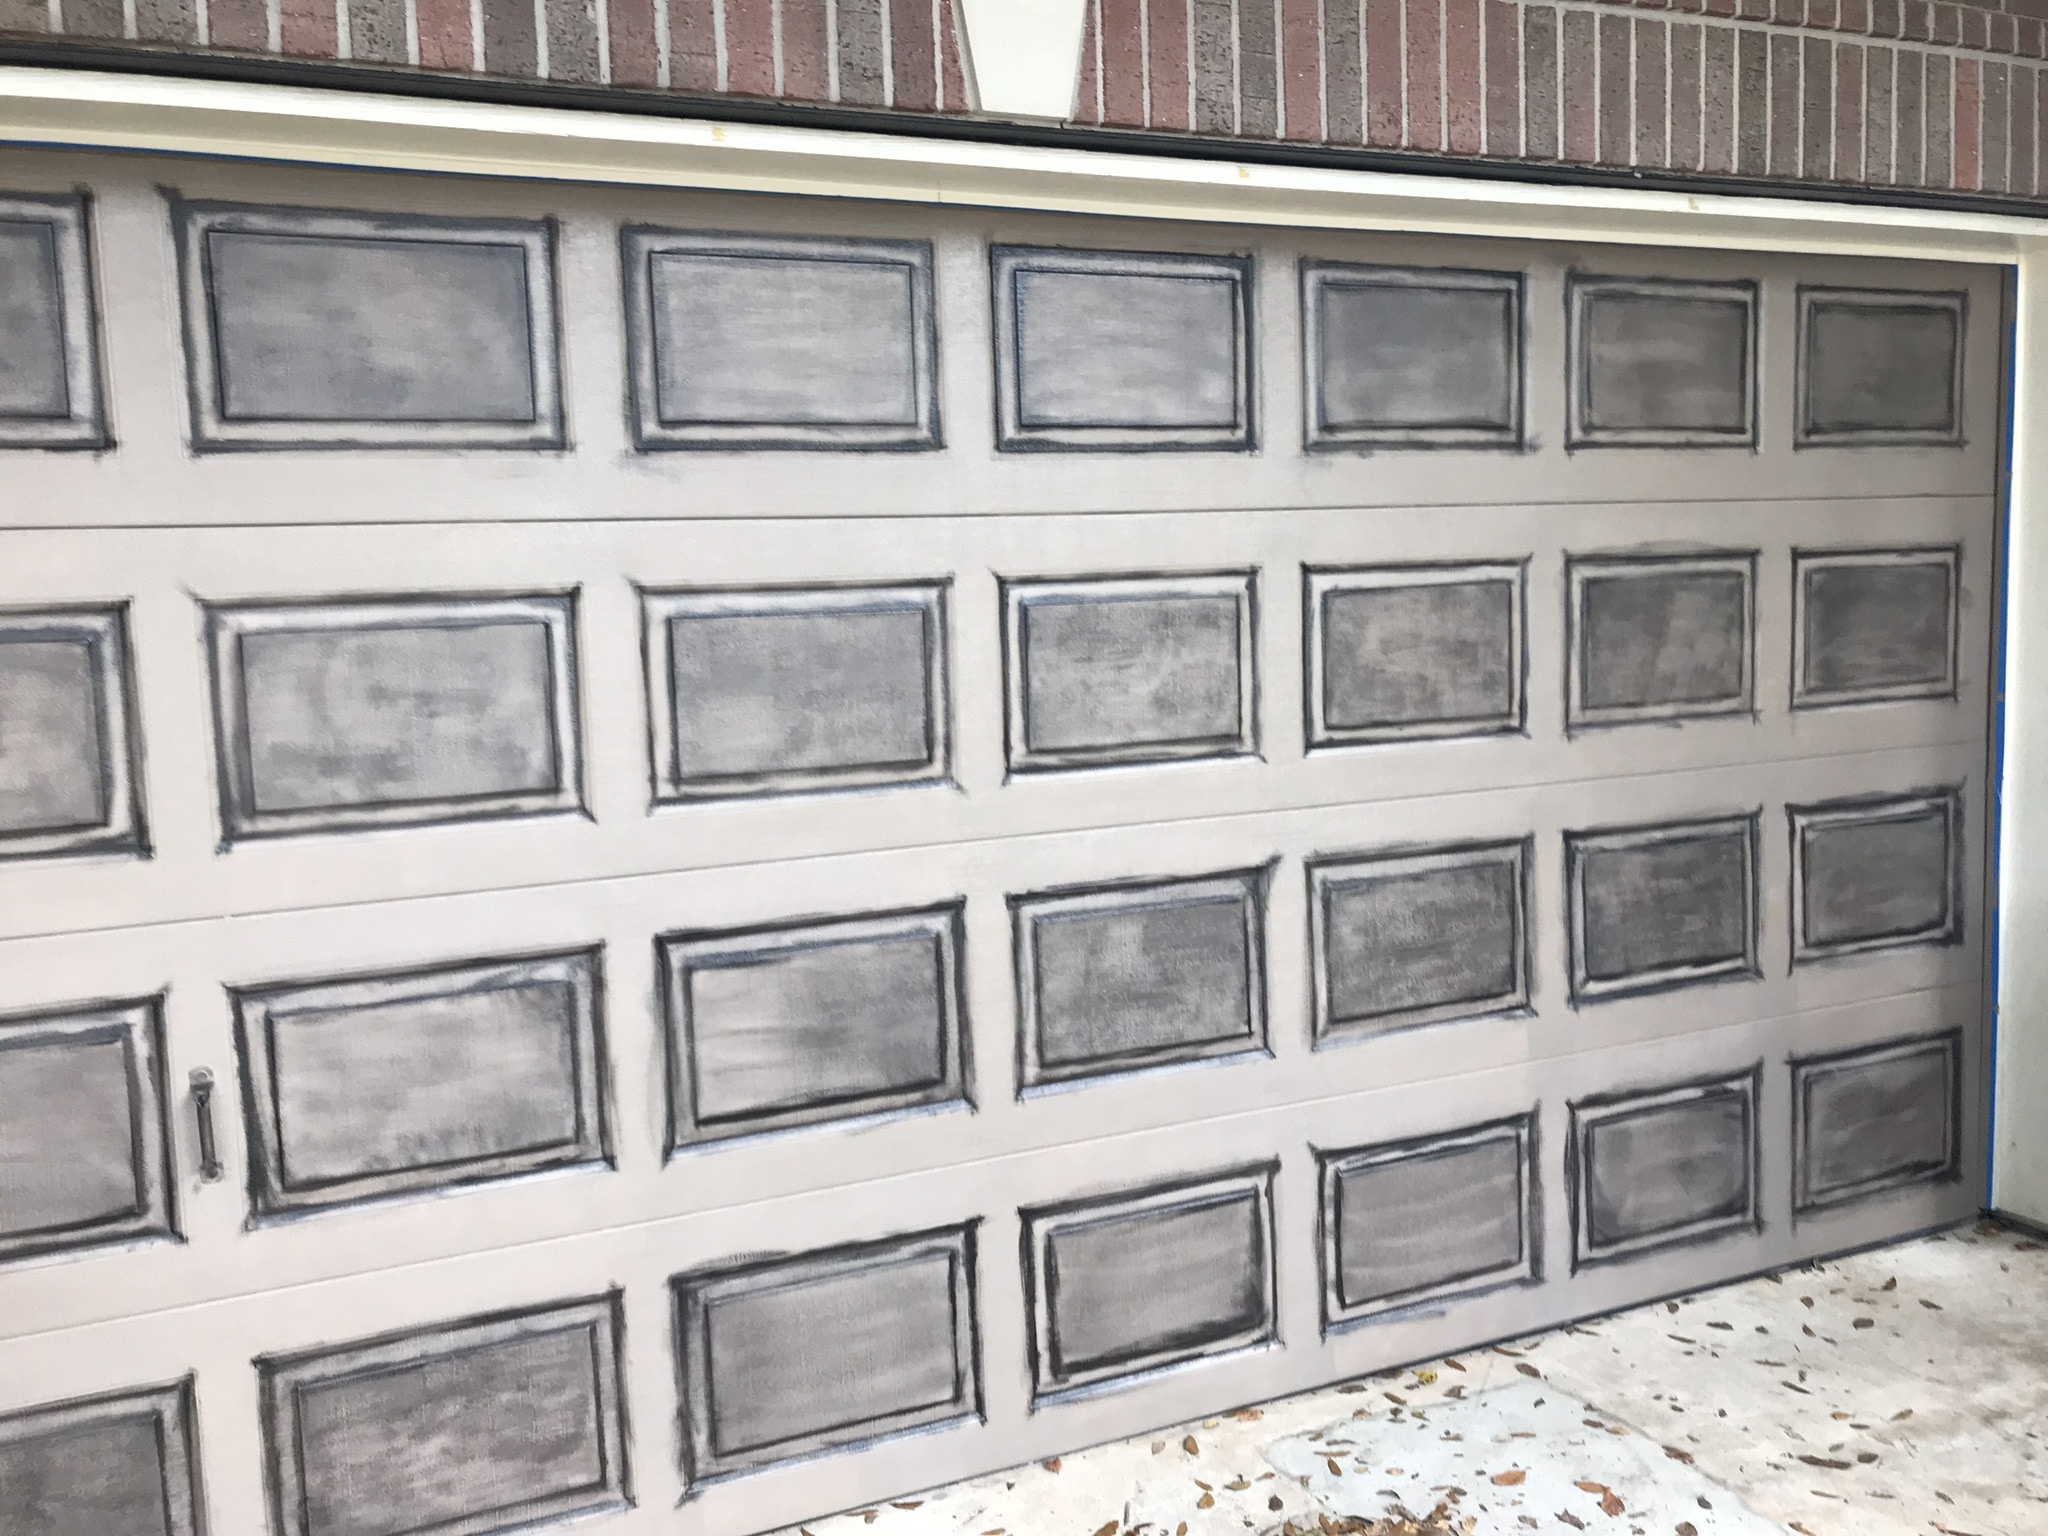
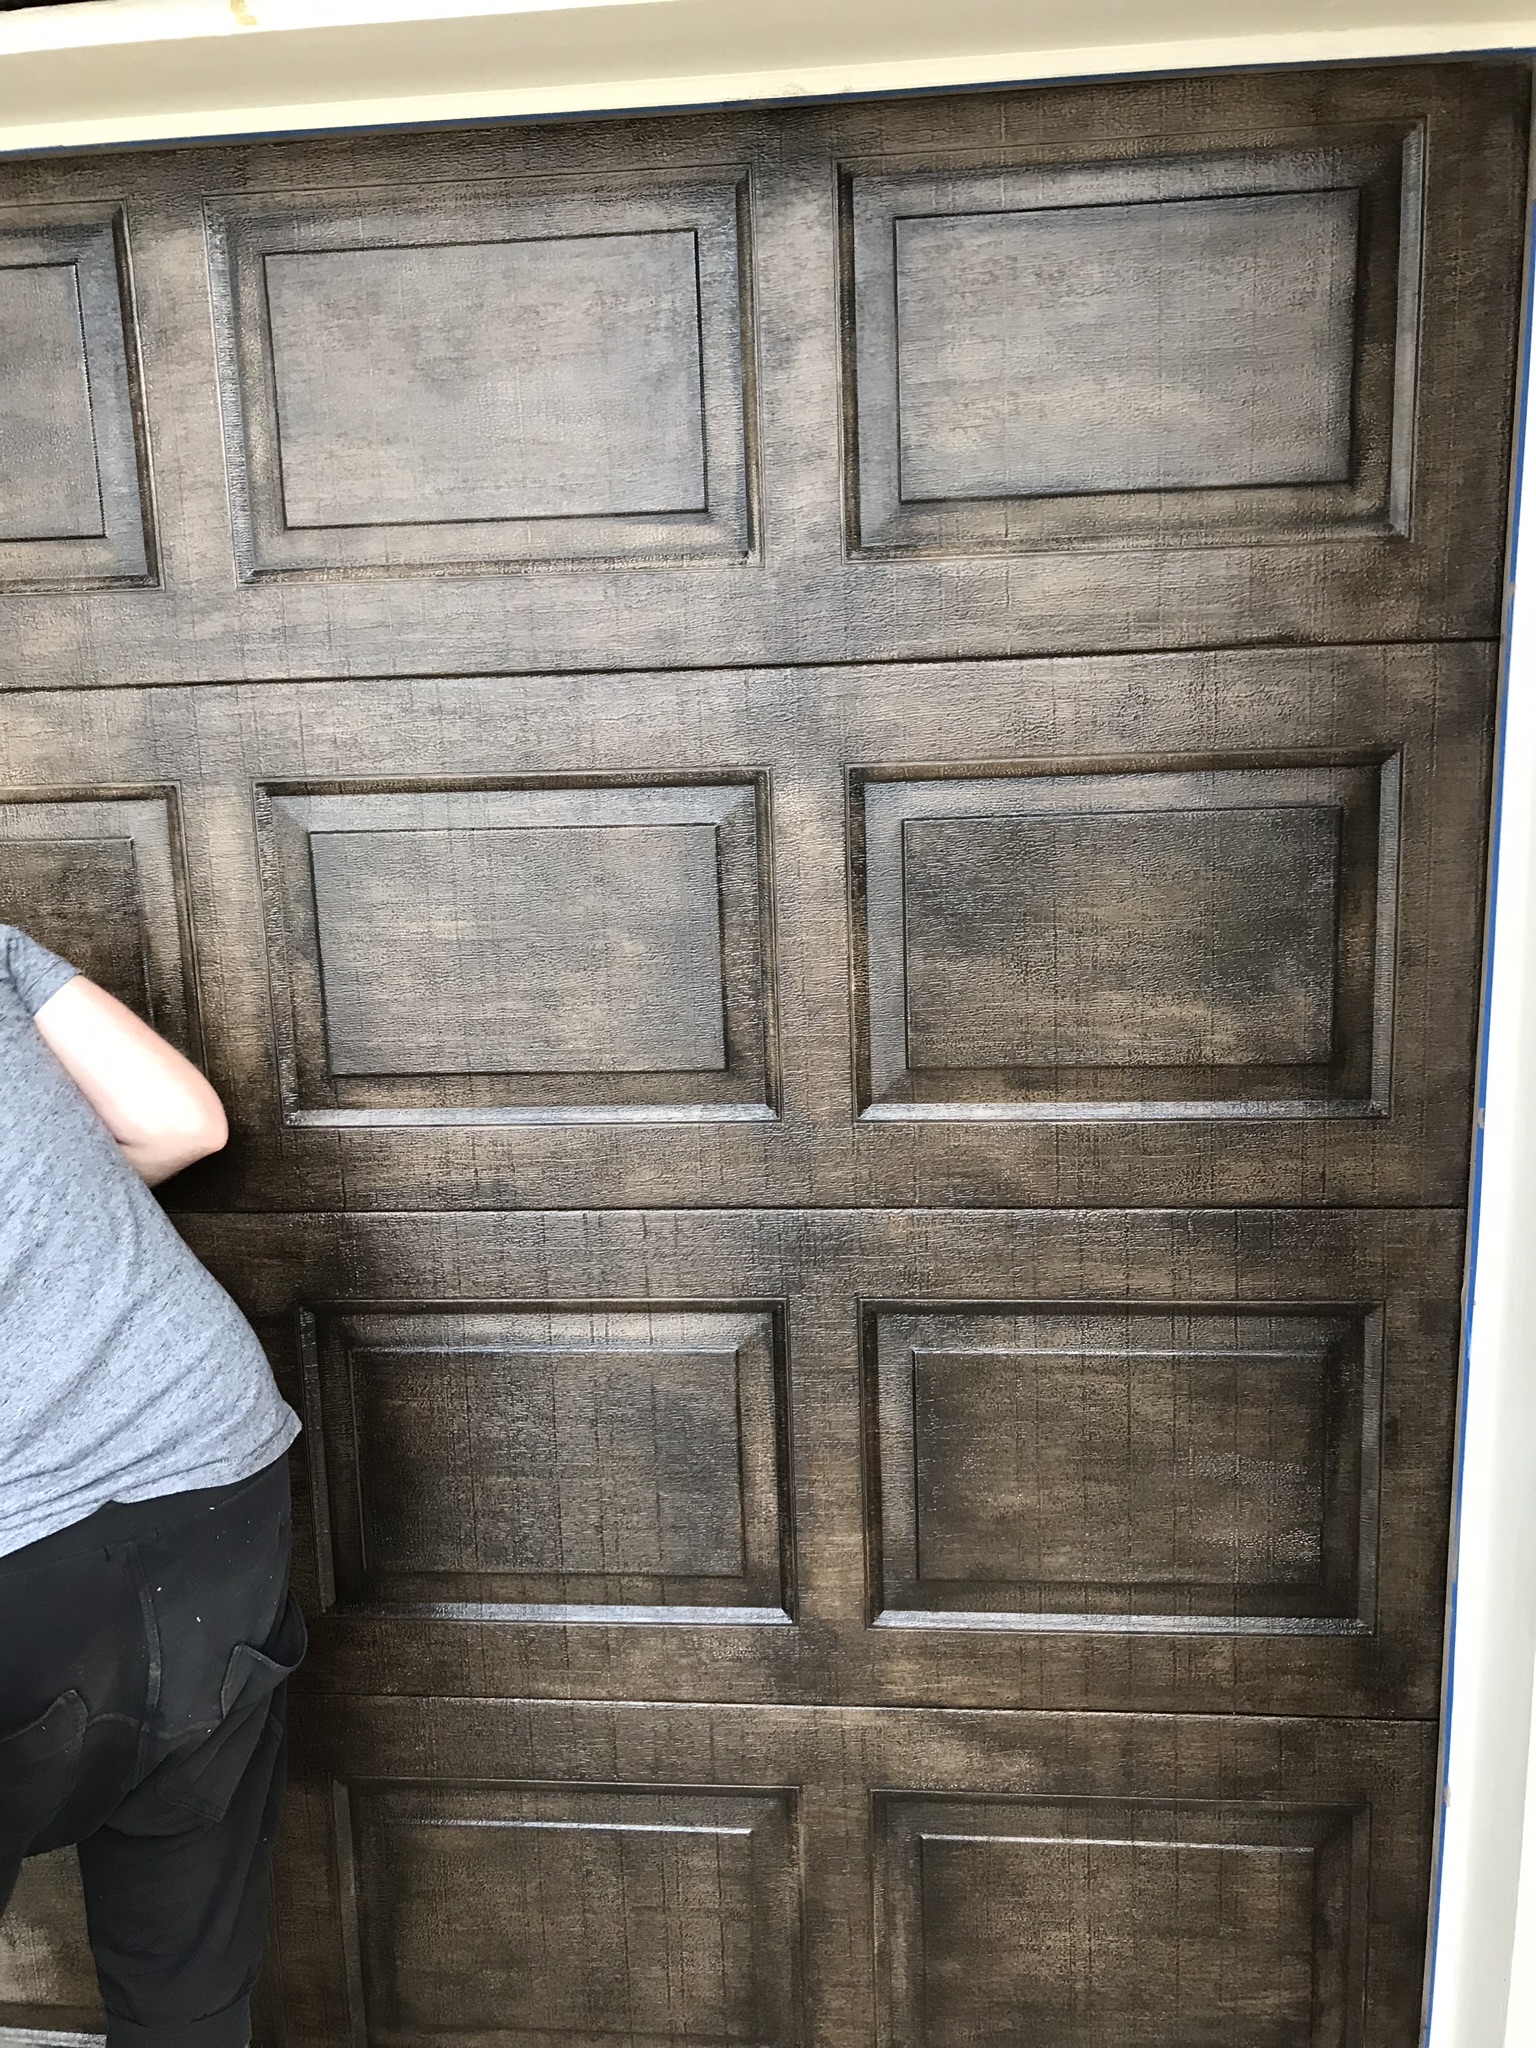
After the gel has dried and it’s not sticky anymore, the second gel stain can be applied. The Dark Walnut is more brown than black. This stain can be applied all over the garage door and on top of the Spanish Oak. Depending on how dark you want to go with the look this is where you have to make a decision and use your “design eye”. If you want the door to look lighter, apply a small amount of the stain and with your cheesecloth or sponge blend it in well so only a small amount of the stain is layered on top. We liked the darker look so we didn’t use the cheesecloth and applied the stain with the chip brush and kept going over it until we achieved the desired contrast.

- After the final stain has been applied, leave to dry overnight before sealing once again with the MasterClear Supreme and you’re done.
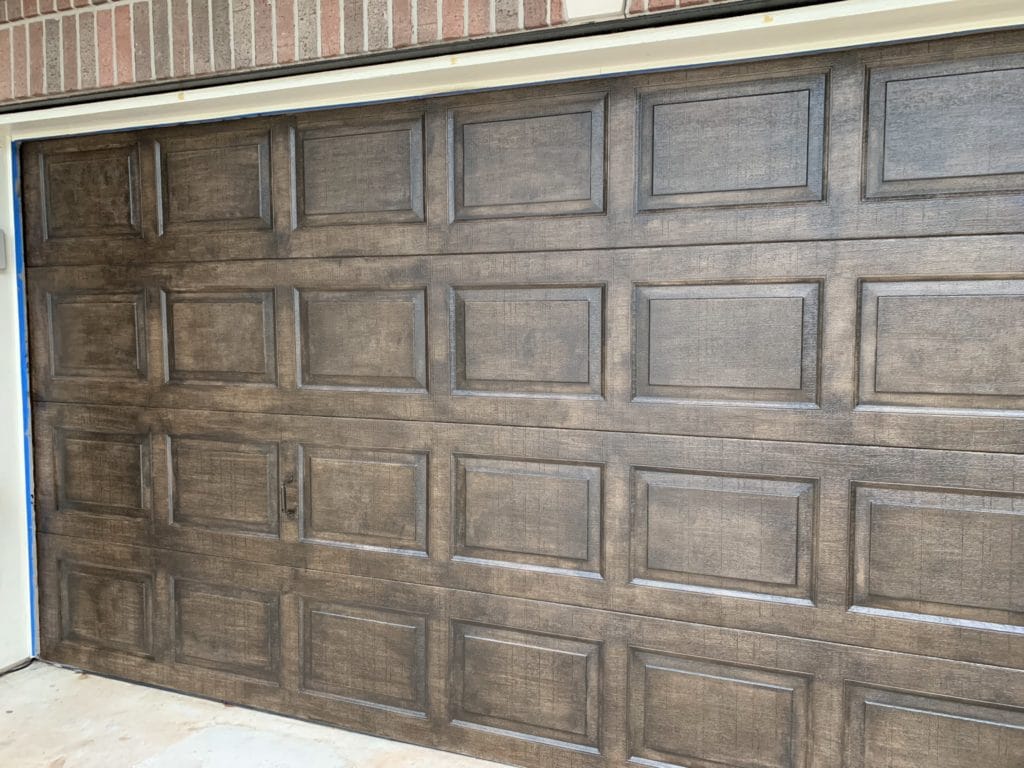

I love the outcome of this project and now we have some great looking garage doors that did not cost an arm and a leg.
Breakdown of cost for this stunning makeover:
- $39 for the paint (we did not use the entire quart)
- $45 for the MasterClear Supreme Quart (You can purchase a gallon for ~$120 but you do not need so much for a garage door this size)
- $16 for the Old Masters Spanish Oak Gel Stain Pint (Used a very small quantity)
- $17 for the Old Masters Dark Walnut Gel Stain Pint (Used a small quantity)
- Chip Brushes, 4″ roller, cheesecloth and gloves – I had plenty of chip brushes available and same with the roller, cheesecloth and gloves but they are relatively inexpensive if you have to purchase.
Total Project Cost = $117 plus applicable taxes in your area.
Total Time – Weekend Project (2 days)
I hope my process has provided a little insight into alternative ways of getting that perfect look you want that’s budget friendly.
If you have a project that feels too overwhelming or you just need some insight on where to start, let us know and we can help. The challenging projects are always the most rewarding when finally conquered.
I’d love to hear what you think of this garage door look. If you have any tips you’d like to share or have any questions, feel free to comment and let me know.
Until next time!